

With the recent news that Google has made the entire Nik Collection FREE, there’s been a lot of new buzz around the set of plug-ins for Lightroom and Photoshop. Up until the early part of 2015, the Nik Collection was my primary ‘Creative’ element in my post processing workflow outside of what Lightroom was capable of. Since then I have started to use Photoshop much more heavily, needing yet more control over my processing than the Nik ‘Control Point’ interface could provide. The software is still very much a large part of my workflow however, and with the tools and functionality that Photoshop provides, I have found some new and interesting ways to incorporate layers created in Nik withing my Photoshop editing. In this quick Tip & Trick, I cover one of these discoveries.
Creating Gritty Color in 3 steps
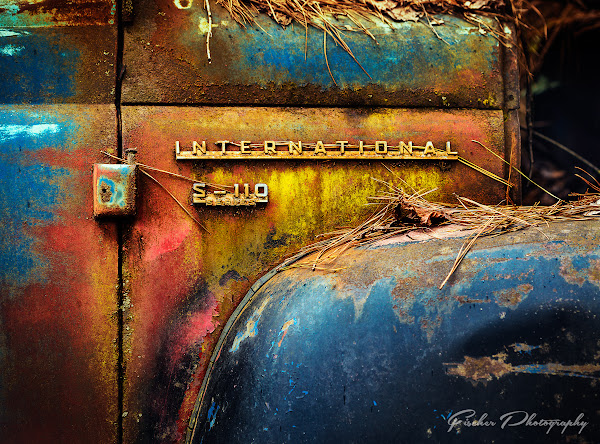
Nik Silver Efex is a fantastic B&W processing plug-in. With a few clicks and slides of sliders you can create powerful B&W images, soft high-key images, and may other looks. While working through my set of photos from Old Car City near Atlanta, Georgia recently, I wanted to accentuate the textures in some of the photos, however keep at least some of the colors in the original. I could have used any number of filters in Nik Color Efex such as Tonal Contrast, or the Detail Extractor filters, but neither of these seemed to have he look I truly wanted. What I wanted was the feel of the Silver Efex monochrome I had created first, but with some (or a lot) of the color. Playing with stacking the original color and the B&W layer in different ways with different blend modes I finally came to a look I liked. I’ve re-used these steps with some slight variation or using layer masks and opacity variations to fine tune the effect.
Step 1
In Photoshop, Duplicate your color layer and export into Silver Efex Pro 2. Pushing the ‘Soft Contrast’ slider to the left with add a tonal contrast like effect, usually around a -32 is in the ballpark for the look I want. Adding structure and other adjustments along the way to give me a B&W image with the grit and texture I want in the final image.
Step 2
Back in Photoshop, drag the B&W processed layer under your color layer. Set the top color layer to blend mode ‘Color’. If it’s not quite what you’re wanting, either proceed to step 3 and try adding a 4th top layer to vary the effect, or change your blend mode to Overlay, Soft Light or Hard Light to see those variations before proceeding to step 3.
Step 3
Make any final adjustments you want to fine tune the look. Dragging the opacity down on the color layer will reduce the color satiation as seen in the header image. Reducing the opacity of the B&W layer (if you remembered to duplicate your original color layer and have one of those at the bottom of the stack still) will reduce the B&W grit effect. Try duplicating the color layer on top and setting that layer to soft light, overlay, or even hard light with varying opacity if you want more color contrast.

Comments
Pingback: Show & Tell: Edsel at Old Car City | Fischer Photography