
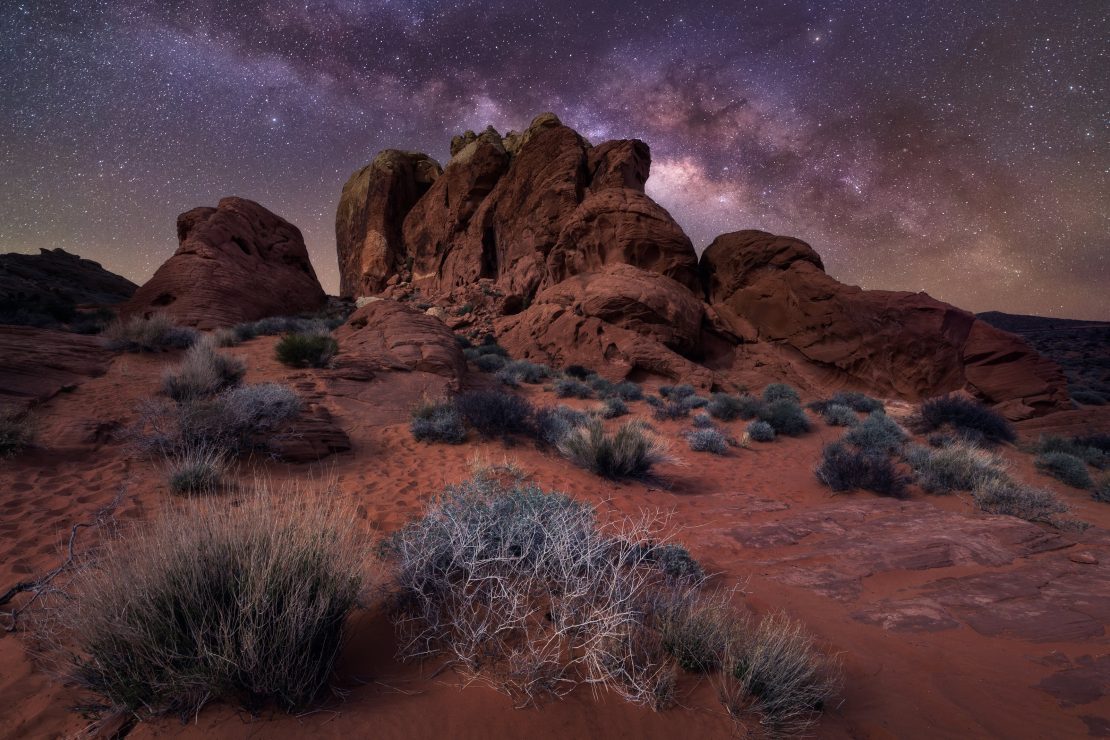
I’m about to break a few hearts, but hopefully also blow a couple minds. This is a composite. Not only is it a composite, the foreground was taken at 5pm, not 5am as it might look. Taking an image that I shot on my way out to Valley of Fire State Park in Nevada on my last day of my 2018 Death Valley trip, and pairing it with a Milky Way exposure I took previously on the trip without a good foreground, I took the best of two photos and made one that really stands out. Achieving a convincing day-to-night composite is not as simple as slapping a night sky frame in behind any old shot you have in your catalog though. And that is the process that I wanted to touch on in some detail in this Show and Tell edition
| Date | Feb. 24, 2018 |
|---|---|
| Location | Lake Mead National Recreation Area |
| Camera | Canon EOS 6D |
| Lens | Canon EF 16-35mm F/4L IS USM |
| ISO | 100 |
| Exposure | 1/50 sec |
| Aperture | 10.0 |
| Focal Length | 16mm |
| Exposure Program | Aperture priority |
| File Id | _MG_9660 |
The Shots
When choosing a shot to consider turning into a Day-to-Night composite there are two primary considerations that I look at. First is the shadows. You want soft shadows, ideally a shot that was taken under partially cloudy skies with very even light, ideally taken later in the day where the shadows are at a significant angle and with the light off to your back shoulder. Shots that were taking looking into the sun with shadows coming directly at the viewer need not apply as without a giant light source also in the frame somewhere the effect is easily ‘broken’. This foreground was shot under nearly ideal conditions. Late afternoon light with high broken clouds created shadows on the rocks to add depth, but they were not harsh, the sun was off my left shoulder creating a fairly evenly lit rock face and foreground bushes. The second consideration is the complexity of the horizon. Trees and bushes that break the horizon create all sorts of headaches for creating an accurate and smooth selection to blend in the night sky frame. In this shot there was nothing but sandstone formations along the horizon, making the selection easy to achieve. More on that in a minute.
For the background shot, I selected a frame that I had taken with my 14mm Rokinon, on the same Canon 6D body. The foreground was at 16mm, so if I were to use a frame taken at 24 or narrower there would be a good chance that the differing focal lengths might be noticeable in the final image. I also didn’t want the sky’s Milky Way to dominate the foreground elements, or even really compete with them too much. So the narrow band of Milky Way core provided by the ultra-wide 14mm was ideal.
The only other consideration when selecting a foreground and background pairing is composition and how the two willy marry. In this case, I selected a photo with a strong sense of sweeping lines from bottom right up to the left, this parallels the position of the Milky Way in this case. Whatever you do, do not flip the background frame to fit your foreground. Anyone who’s spent any amount of time shooting astrophotography will immediately pick up on the fact the core is slanted the wrong way in the sky and someone will sooner or later call you on it – some more politely than others.
Processing

The processing for this photo, as with all my photos started in Lightroom. The first step is to start the slow transition of making the photo look like it was taken at night. This generally means a darker, lower contrast photo, with cooler white balance, and maybe at least for me a touch more in the magenta tint. While most of the time I make ample use of Dehaze and the ‘Lights’ slider in the curves adjustment of Lightroom, I was much more restrained with both for this shot’s Lightroom edit. I actually started with a 2-shot bracket set for the foreground, starting with the darkest under-exposed shot first, then blending in the mid-exposure into the middle region of the rocks and foregrounds, letting the rocks on the far left and right come from the dark frame. This helped focus attention in the center of the frame, but also aid in the illusion of a night shot with limited light sources.
Next comes in the sky layer. Using the TK Panel by Tony Kuyper I was able to use the blue channel selection with a strong levels adjustment to give me a perfect selection along the horizon in a single step. For this shot, I used the background frame twice, once across the entire sky as you’d expect, then I took a duplicate of the placed sky layer, set it to soft light and blurred the layer with a Gaussian Blur of around 60px, before reducing the opacity as well as painting in the mask some with a soft black brush along the sky just a bit (around Opacity). This ‘soft Orton’ effect brings a lot of depth and color to the sky, matching better with the rich dark hues of the foreground, but not letting the darkening effect reach right to the horizon at full strength.
With the night sky frame placed against the foreground; levels, curves and a soft light dodge/burn layer were then applied between the foreground and background layers to bring the exposure of the background to pair against the night sky. This is where the power of layers really shines, being able to place adjustment layers between the foreground and background layers, as to only affect the foreground lets you fine tune the foreground exposure and contrast so that it results in a realistic match while leaving the background alone.
Now with a foreground and background paired up that looks close, the rest of the edit proceeds as you would if you had taken the two as a single frame. For this shot a slight adjustment to white balance was used to bring out a tad more magenta that I like in my night shots and give the red sand an even richer hue, a levels adjustment with mid-and-bright regions selected helped bring some ‘pop’ to both the sky and the rocks and brush in the image. A series of both burn/dodge, orton and levels layers were added before a final ‘clean up’ layer for cloning distracting elements out of the frame to pull the image together. I was careful to not allow the sky near the horizon to darken too much, nor the rocks along the horizon to get too bright. The sky should always be the brightest element unless there is an obvious artificial light source in use (see my shots from Castolon in Big Bend for an example)

All Photoshop Layers – some even captioned well!
Above is the full set of layers used in the edit as described above. I tried to go back and give a few of the critical layers specific names to make it more clear what the purpose of it was. Above the selected layer is mostly just the ‘creative’ edit as I call it, and will be somewhat different from photo to photo. One thing you will notice is that the sky frame is not only positioned but also rotated somewhat. This was to give the position of the Milky Way a close parallel feeling to the lines created by the foreground rock formations. Layer 6 is a little different of a type of Orton effect than the ‘Soft Orton’ that I used for the sky, a ‘normal’ layer set to a very low opacity (6-8%) and blurred at around 30px. Below I will present a sequence of screen shots from key stages in the edit.

Foreground Blend of 2 images, the left/right edges kept dark. Could also use various other methods for this.

Foreground levels/curves to reduce exposure further

Sky Blended in with primary adjustments.

Final Edit version
I hope I haven’t crushed anyone’s sense of what is real and what isn’t. Day-to-Night edits are not something I do very often, the image just has to speak that is what it needs to bring out it’s best. After doing a couple of your own, you’ll soon start to be able to notice and identify likely similar edits from other photographers on popular social media and photography sharing sites. For me, both completing and identifying shots that are likely these sorts of composites both opened up the possibilities of what can be achieved with a realistic look, as well as bringing some of what I see out there into a better focus of what it actually is – or isn’t. There will be some that will cry foul for any shot that isn’t 100% as-is out of camera, but to me, as long as one is honest to those they share it with, and the intent is to show the world’s most beautiful places in their best light – even if that light is helped along a little, that’s okay in my book.