

When moving from point & shoot cameras to a DSLR or mirrorless camera with an interchangeable lens, the myriad of lens choices can be a bit difficult to grasp. Understanding what all the numbers mean, and what they mean to your style of shooting can take some time to get a handle on. So here’s a few tips and tidbits of information I’ve picked to help translate those numbers into meaningful knowledge to fuel your creative choices.
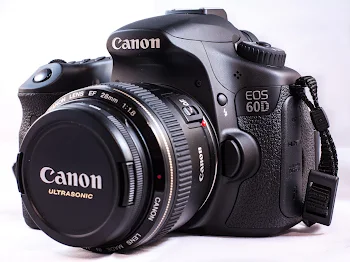
1) Focal Length – The primary specification on a lens is the focal length, and is measured in mm. The measurement is taken from camera’s sensor out to where the light entering the camera converges as it passes through the various optical elements of the lens, not the actual outer physical length of the lens. When comparing lenses, the smaller this focal length number the wider angle of view, the larger the number the more narrow the field of view. Prime lenses have a single value, where as zoom lenses will have a range. The wider the range the more flexible the lens will be for a multitude of shooting situations, but they will have some trade offs in image quality and often maximum possible aperture for this flexibility. Canon has a good comparison app and chart on its website. Focal length along with maximum f-stop (discussed next) are often printed on the lens barrel, for easy identification. If you can not find the information on the barrel, try finding it on the end of the lens around the edge of the front element.
For full frame sensors, wide angle lenses are generally sub-24mm focal length, generally used for landscapes or interior real estate photography, but can also be used for creative use in portraits. Standard focal lengths are from 24 to 50mm, called standard because it somewhat matches the field of view of the human eye. The 50mm prime is extremely common for street and portrait photography. Beyond 50mm you start entering into the range of telephoto lenses. Short telephoto lenses are used commonly in portraits, the 70-200 is an extremely flexible general portrait option. 300mm and longer are generally used for zooming in on distant subjects from elusive wildlife or aircraft.
2) F-stop / Maxium Aperture – The second specification on a lens is the maximum F-stop of the lens. For primes and some higher-end zoom lenses this is a single value, other zoom lenses this is a variable value that changes based on the focal length the lens is set at. The smaller the f-number the more light is allowed into the lens, and the shallower the depth of field that the lens can achieve. It is important to remember that the F-number is a ratio between the diameter (width) of the aperture (ie: how big the aperture is) and the focal length. This is why the number changes based on focal length in some lenses that are not designed to account for the focal length change. The Aperture is the part of your lens that controls how much light passes through it and onto the sensor. Along with the exposure time and camera sensor sensitivity, it makes up one corner of the Exposure Triangle. Wikipedia’s page on F-number goes into more depth (and math) regarding this topic. F-numbers are usually displayed as f/# or 1:#. Prime lenses typically have larger maximum apertures than their zoom lens counterparts, allowing for a shallower depth of field. This is one reason they are often used by portrait photographers looking to isolate their subject against a out-of-focus background, also well as their single focal length allowing the design to be optimized for sharpness. For landscape photographers shooting during the day, shooting with lenses with a very low f/stop is not as important. Low F-stop number lenses, especially those with fixed aperture zooms, weight more than their slower counterparts of equal build quality. Compare the weight of the 70-200 F4 from Canon (1.5 lbs) to the F2.8 version (3.25 lbs).
3) F-stop Calculation – Because the F-number is a ratio of focal length to lens diameter, a photo taken at any focal length but at the same f/stop number will require the same exposure length for the same exposure rate. A photo taken with a 100mm lens at f/2.8 at 1/100sec and a photo taken with a 400mm lens at f/2.8 at 1/100sec and a photo taken with a 24mm lens at f/2.8 will be just as bright as each other under equal lighting conditions. This becomes helpful as you start shooting in Manual modes and can more quickly dial in an approximate starting point for the conditions. Sunny skies vs astrophotography, it won’t matter if you’re shooting a 14mm or 300mm if your exposure and aperture match.
4) Best Apertures to Use – Few lenses are at their sharpest at their minimum and maximum f/stop numbers. Stopping down slightly (closing down the aperture) will usually yield better crisper photos, but requires either a slower shutter speed or higher ISO speed to keep the exposure the same. On the other end of the scale, stopping down to very small apertures (f/18 and beyond for most lenses) can also cause a decrease in image quality as the light has to bend as it enters the lens through the extremely small aperture opening. Knowing your lenses limits and characteristics is a matter of use and experience (and probably a little research ahead of purchase if you need/want to be able to use a lens at extreme f-stops). For most lenses the ‘sweet spot’ is from 1-full stop down from wide open to around f/10. For portrait photographers, stopping down off the minimum 2.8 to 3.2 may or may not give noticeable differences, but stopping down to F/4 may no longer give the background softeness they want. Landscape photographers may be tempted to stop down to f/18 and beyond to get all the depth of field possible, but detail loss throughout the image is usually not worth it in my opinion.
5) Aperture, part of the Exposure Triangle – The F-stop (Aperture) / shutter speed (Exposure time) / ISO speed (Sensor/Film Sensitivity) are the three elements that a photographer can adjust in camera to control the overall exposure. Depending on which of the three elements are adjusted, other characteristics are changed as well, so no one answer is always the right one in balancing your exposure. Adjusting the Aperture will also change the depth of field (how much or little of the photo is in sharp focus). Portrait photographers want soft backgrounds to make their subjects pop, ensuring they are not ‘lost’ in the background. Landscape photographers want fine detail from the nearest point all the way to the horizon and beyond, so often Aperture is often the first value locked in. Sports photography don’t care near as much about depth of field so this is more often one of the ‘variable’ values. Modifications to exposure time affect how much motion blur is in the photo (ie: freezing the action). This could be blur due to lens movement while shooting hand held, or movement in the world in front of the lens. Changing the ISO will increase or decrease the amount of noise introduced into the image. While modern digital cameras have achieved huge increases in low light noise, few cameras look as good at ISO 6400 as they do at ISO 100. As eluded to, depending on the style of photography you are focused on at the time, which corners of the triangle are more ‘locked’ will change. Don’t let yourself be suck in ‘landscape’ frame of mind if you’re shooting a sporting event.
6) Image Stabilization and Minimum Shutter Speed – Without included image-stabilization, photos taken hand-held (without a tripod or other stable mount) at shutter speeds less than 1/focal-length are highly likely to suffer from hand-shake induced blur. ie, for a 50mm prime, aim to keep shutter speeds at 1/60 sec or faster to ensure that a large majority of your photos are sharp. When using long telephoto lenses such as a 70-300 at its full length, a shutter speed of 1/300 is your minimum shutter speed for hand-held shots, I try to keep it closer to 1/500 for a higher success rate. Lenses (or cameras) with built-in image-stabilization can reduce these minimum shutter speeds by 2-4x or better in some cases, but it is a good rule of thumb to try to keep within even when using IS if possible. When using a tripod, it is best practice to disable Image Stabilization, most lenses attempt to ‘steady’ the lens even when no shake is present, resulting in actually reducing overall sharpness instead of aiding in it. Note – this rule assumes you are shooting with a full-frame sensor camera. So you must further increase the this when shooting with crop sensor, Micro 4/3 and other smaller sensor cameras.
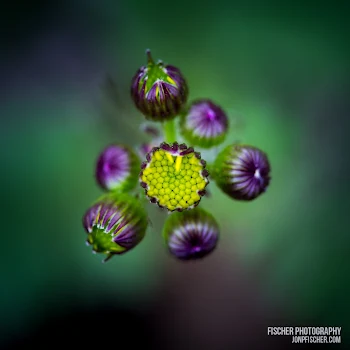
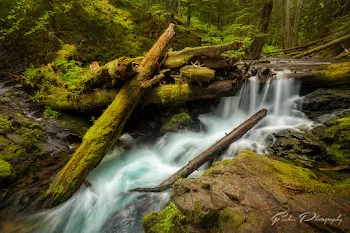
7) Depth of Field – Focal length and F-stop have an effect on depth of field. The longer the focal length and the smaller the f-number (ie: bigger aperture) the shallower the depth of field becomes. The focal distance (ie: how far or near the focal point is) also has an effect on depth of field. A 100mm lens at f/2.8 focused at 1 meter from the end of the camera has a very narrow depth of field, as little as a quarter-inch or so, and it is difficult to get more than a few inches of sharp focus with the 100mm at very near distances, even with the lens stopped down to f/22. An 18mm lens on the other hand at f/18 focused at infinity on the other hand has a very deep depth of field, allowing both the flowers in the foreground and the mountains in the distance of a landscape photo to both appear to be in focus. A tip though, even at 18mm and f/18, fine tune your focus either in manual focus or by selecting an auto focus in the mid-foreground to ensure the foreground is at its sharpest. Understanding and knowing how to find the hyperfocal distance is key utlizing the maximum depth of field. Experimenting and learning to control the depth of field and playing with parts of the photo in and out of focus can yield a great deal of creativity and beauty in your photos. One more thing to note, very deep depths of field can also make any dust or dirt on your lens or sensor show up as dark spots on the photo. A good reason to keep your equipment clean!
8) How to get the best Sunstars – The sun and other sources of light can produce spectacular stars of light when the lens is stopped down to very small f-numbers (ie: f/16, f/18, f/22, etc). The number of points in the star is directly related to the number of aperture blades the lens has. If the camera has an even number of blades, the number of points is equal to the number of blades. However, if the number of blades is an odd number, the points of the star is double the number blades, yielding 18 points for a 9 blade aperture design. This is because when the number of blades is even, those ‘extra’ points line up with one another and appear to be a single point, where when it is an odd number they do not over lap. Just remember to never look directly into the sun with a DSLR view finder, especially when using a telephoto lens of any sort. Make use of the Live View or an Electronic View Finder as found on many newer mirrorless cameras.
9) Lens Flare – Very wide-angle lenses (ie, those with very small focal lengths) are often very prone to lens flare, due to the wide angles in which light can enter the lens. Remembering to make use of a lens hood, or even your hand, can help combat lens flare, but when using these wide lenses you also have to be aware of where the sun and other light sources are and what effects they can have on the image. Night shots with multiple lights at the edges of the frame, or just off frame, can be especially bad to combat this effect. Sometimes you just have to accept that there will be some flare and try to make it an artistic element in the photo, take multiple exposures while blocking some sources of flare, or remove it in post processing. Some lenses have multiple coatings on their various optical elements to try to combat this issue, while using any sort of additional filters, such as UV often used to protect lenses from damage, can often make the problem worse.
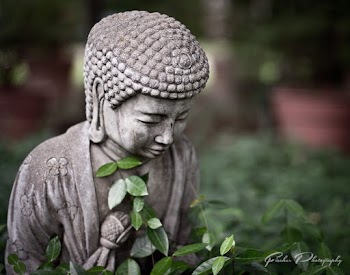
10) Bokeh – Many people call the out of focus areas of a photo it’s ‘Bokeh’, however more accurately it is the ‘out of focus highlights‘ in a photo. How Bokeh is rendered by a lens is dependent largely on the shape of the Aperture. Round Apertures produce round Bokeh, Aperture blades that close down in a geometric shape (hexagon, octagon, etc) will produce Bokeh that are also geometric in shape. The type and design of the glass elements in the lens also have an impact on how these out of focus highlights are rendered. Some produce brighter rings around the edges, and other less appealing artifacts to the light source. Finding a lens with rounded aperture blades and most often prime lenses produce the most appealing Bokeh looks.

Exposure Triangle Review
Exposure Length
The exposure length is defined by how long the shutter stays open. Many DSLR cameras have a minimum shutter of 1/4000th or faster
Exposure Effect
Short shutter speeds freeze motion, long shutter speeds can introduce blur, both good and bad
Aperture
By setting the size of the aperture, you control the rate which light enters the camera. Stopping down slows down the volume of light.
Exposure Effect
Stopping down will increase depth of field and generally sharpen the image up till around f/16. Open up to increase shutter speed, close for longer.
ISO (Sensitivity)
How sensitive the sensor is to light falling on it. Sensors pixels hold values of 0 to 255, ISO determines how much each 'unit' of light increases this value.
Exposure Effect
Higher ISO introduces noise into your image, reducing detail and adding artifacts in areas of smooth color.
Comments
Pingback: christian louboutin
Pingback: doudoune moncler